 |
 |
 |
 |
Taylor K-1541ChemWorld is a distributor of Taylor Technologies Test Kits and Reagents. Order directly online and save today.
DROP TEST BORON (1 drop = 0.2 or 0.5 ppm)
COMPONENTS:
1 x 4026 Dipper, plastic, large
1 x 4040 Sample Tube, Graduated, 50 mL
1 x 4044 Dipper, plastic, small
1 x 5017 Instruction
10 x 6086 Syringe Filters, 0.45 micron, PES
1 x 6087 Syringe Adapter
1 x 6247 Syringe, 60 mL, plastic
1 x 7023 Bag, Plastic 2" x 3"
1 x 9187 Sample Tube, Unmarked
1 x R-0953 Boron Reagent #1, DB
1 x R-0954 Boron Reagent #2, DB
1 x R-0955 Boron Reagent #3, DB
2 x R-0956 Boron Reagent #4
1 x R-0957 Boron Reagent #5, DB
1 x R-0958 Boron Reagent #6
1 x R-0959 Boron Titrating Reagent (Low Range), DB
1 x R-0960 Boron Titrating Reagent (High Range), DB.
NOTE: It is important to adhere to the timed waiting periods for
accurate results.
Sample Preparation
1. Rinse and fill 50 mL sample tube (#4040) to the 50 mL mark with
water to be tested.
2. Add 10 drops R-0953 Boron Reagent #1. Swirl to mix.
3. Add 10 drops R-0954 Boron Reagent #2. Swirl to mix. Sample should
turn peach/yellow.
4. Add R-0955 Boron Reagent #3 dropwise, swirling after each drop,
until color changes from peach/yellow to blue.
NOTE: A precipitate will form if metals are present.
5. Using the small (white) dipper (#4044) add 3 level scoops R-0956
Boron Reagent #4. Swirl until dissolved.
6. If color remains blue, continue to Step 7. If color turns green
or yellow, add R-0955 Boron Reagent #3 dropwise, swirling for 15
seconds after each drop, until color turns blue.
7. Wait 2 minutes.
NOTE: The color must remain blue for two minutes while the
precipitate forms. If blue color becomes green or yellow,
add more R-0955 Boron Reagent #3 dropwise, swirling after
each drop, until color turns blue again. Wait 2 minutes.
8. Following the instructions below, filter the treated sample into a
clean, dry, unmarked sample tube (#9187).
a. Remove plunger from 60 mL syringe (#6247) and set aside.
b. Screw syringe filter (#6086) onto the syringe.
c. Carefully pour all of the treated sample into the syringe.
d. Holding syringe upright and over the unmarked sample tube,
replace the plunger in the syringe and carefully depress
plunger until it clicks into position.
e. Slowly depress plunger to filter treated sample into the
sample tube.
9. The sample is now ready for titration. For boron concentrations
between 0 and 5 ppm, follow Low Boron Concentration instructions.
For boron concentrations between 5 and 15 ppm, follow High Boron
Concentration instructions.
For Low Boron Concentrations (0-5 ppm)
10. To the sample prepared in Sample Preparation (Steps 1-8) add
R-0957 Boron Reagent #5 dropwise, swirling after each drop, until
color changes from blue to yellow.
11. Add R-0959 Boron Titrating Reagent (Low Range) dropwise, swirling
after each drop, until the color changes from yellow to green.
NOTE: If color turns blue, repeat Steps 10 and 11 until green color
is achieved.
12. Using the large (beige) dipper (#4026) add 1 level dipper R-0958
Boron Reagent #6. Swirl until dissolved. Sample will turn yellow if
boron is present.
13. Add R-0959 Boron Titrating Reagent (Low Range) dropwise, swirling
and counting after each drop, until color changes from yellow to
green. Always hold bottle in vertical position.
14. Multiply drops in Step 13 by 0.2. Record as parts per million (ppm)
boron.
For High Boron Concentrations (5-15 ppm)
10. To the sample prepared in Sample Preparation (Steps 1-8) add R-0957
Boron Reagent #5 dropwise, swirling after each drop, until color
changes from blue to yellow.
11. Add R-0960 Boron Titrating Reagent (High Range) dropwise, swirling
after each drop, until color changes from yellow to green.
NOTE: If color turns blue, repeat Steps 10 and 11 until green
color is achieved.
12. Using the large (beige) dipper (#4026) add 1 level dipper R-0958
Boron Reagent #6. Swirl until dissolved. Sample will turn yellow if
boron is present.
13. Add R-0960 Boron Titrating Reagent (High Range) dropwise, swirling
and counting after each drop, until color changes from yellow to
green. Always hold bottle in vertical position.
14. Multiply drops in Step 13 by 0.5. Record as parts per million (ppm)
boron.
NOTE: Syringe filters are disposable, but may be reused up to five
times, if cleaned after use by the following procedure:
1. Unscrew the used syringe filter from the syringe.
2. Screw the syringe adapter (#6087) onto the syringe.
3. Fill the syringe with distilled, deionized, or tap water.
4. Attach the used syringe filter to the syringe adapter.
5
. Slowly depress plunger to rinse the syringe filter (over sink or
other suitable receptacle).
6. Remove the syringe filter.
7. Repeat Steps 3-6.
8. Unscrew the syringe filter and store it in the plastic
2" x 3" bag (#7023) (provided in the kit) for future use.
Once a syringe filter has been used five times it should
be discarded.
NOTE: Clean and thoroughly rinse sample tubes and syringe with distilled,
deionized, or tap water between tests.
If the syringe plunger begins to stick, coat the plunger with
a thin layer of petroleum jelly.
INTERFERENCES:
Calcium hardness above 1000 ppm may interfere with the test. Interference
from high calcium levels can be removed in Step 2 of Sample Preparation by
adding additional drops R-0953 Boron Reagent #1.
For samples containing 1000-1500 ppm calcium hardness, add 5 additional
drops (15 drops total) R-0953 Boron Reagent #1. For samples containing
1500-2000 ppm calcium hardness, add an additional 10 drops (20 drops total)
R-0953 Boron Reagent #1.
Zinc concentrations above 500 ppm may clog the filter. If the filter
becomes clogged during filtration (Step 8 of Sample Preparation), the
filter can be replaced with a new filter and the filtration continued.
To remove a clogged filter, hold the syringe upright. Pull the plunger
down approximately 1/4 inch and release to remove any positive pressure.
Continue holding the syringe upright and carefully unscrew the clogged
filter. Replace it with a new filter and continue filtering the sample.
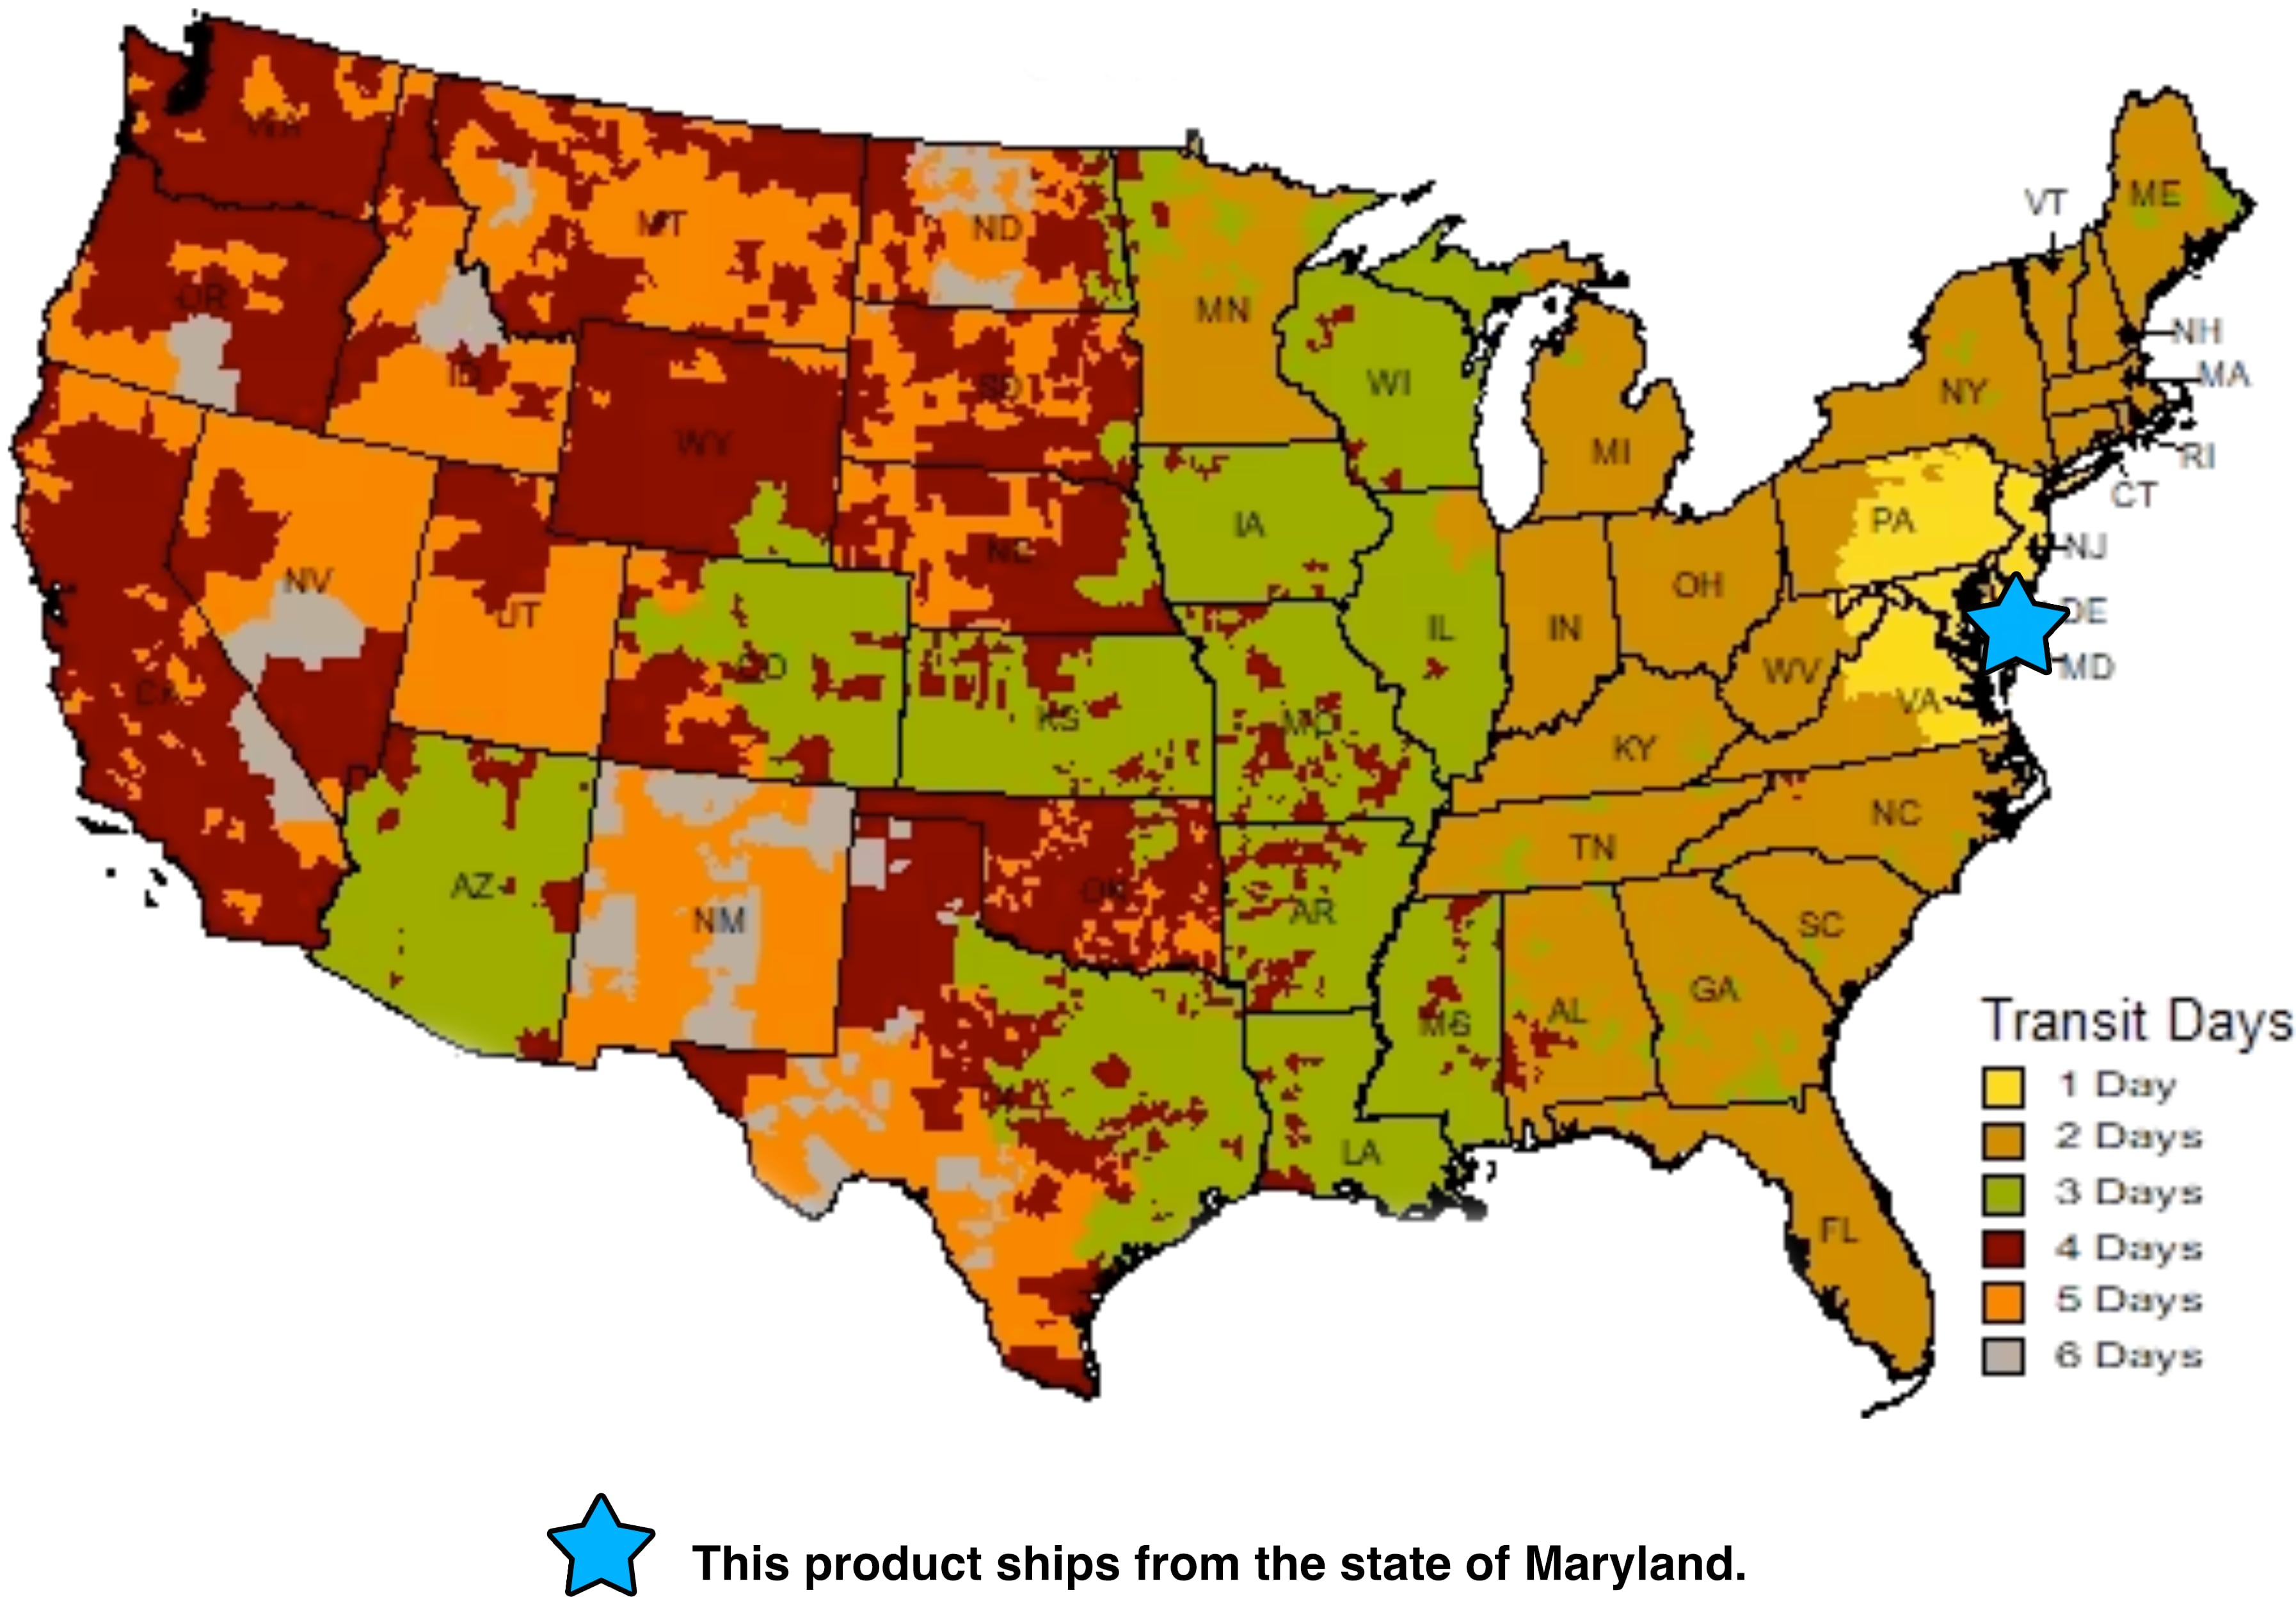
This product ships within approx. 5 to 7 business days from the state of Maryland.
Listed below is the shipping transit time for 2024. UPS transit map - This product only ships UPS. We can not ship this product via Fedex or USPS.
- We can ship internationally.
- We can not ship this product to a PO box.
- If the product is Haz mat. It can not can not ship this via Air.
You will receive the tracking info after the order ships within 48 to 72 hours. We do not offer expedited shipping for this product.
If you can not order online, call in your order at 800-658-7716.
|
|
 |
 |
 |
 |

|
